Tuesday, February 16, 2010

Having a Ball Making Ice Cream!

Not exactly gourmet, but certainly delicious, is the homemade ice cream you can make with a pretty novel little gadget I call the Ice Cream Ball. It's actually called the Play N Freeze Ice Cream Maker and it is sold by UCO. I got this great tool from my son for Christmas a few years ago and it has already gotten some good use.

Just like a regular ice cream maker, it freezes your own combination of cream and other goodies, using ice and rock salt. What is great about this ice cream maker is that it is in the shape of a ball, and the kids toss it around, like a toy, to make the ice cream freeze. No electricity or batteries required and so much fun!!

We used it the other night when we had friends over for a barbeque and will continue to use it whenever we want delicious, freshly made ice cream.

Be warned, though, this is not perfect ice-cream - it may be a little, lumpy or too creamy in consistency. The beauty is in the fun of making it and in having control over the ingredients you are putting into your body.

Here is the link to the Ice Cream Ball on Amazon, if you'd like to check it out and here are a few of my recipes for home-made ice cream in a ball.


Strawberry-Banana Ice Cream (Preferrably all organic ingredients used)
2 mashed ripe bananas
1 1/2 cups heavy whipping cream
2/3 cup sugar
1 cup partially thawed, chopped frozen strawberries


Island Dream Ice Cream
2 mashed ripe bananas
1 1/2 cups heavy whipping cream
1/2 cup chopped macadamia nuts
1/2 cup sugar
2 Tsp Vanilla extract
1/4 cup shredded sweetened coconut

~ Enjoy!!

Monday, February 1, 2010

Rosemary Lemon Chicken

Rosemary Lemon Chicken is my husband's favorite dish. He would argue with that statement, but I know it is true, because it is what he asks me to make it more than any other recipe. In fact, he would like me to bake a chicken at least once a week and sometimes, I do.

There are so many good reasons to do so .... delicious, tender chicken the first night, chicken sandwiches the next day, chicken enchiladas for dinner the next night, and chicken soup or chicken stock, for a savory and complete end to the bird.

Homemade oven-roasted chicken will always beat the store-bought Costco or Safeway version in tenderness and taste. In addition, you know there will be no MSG or other preservatives and chemicals. I make sure to use only organic - free range chickens whenever possible. It costs a little more, but definitely worth it.

Oven-roasted chicken is a very easy dish to make, as well. In fact, once you put it in the oven, set the timer and pretty much forget about it.

Rosemary Lemon Chicken
1 Small Young Frying Chicken (approx. 5 lbs)
2 Lemons
1 Medium Yellow Onion
3 large Sprigs Rosemary, leaves removed and finely chopped
2 TBS Butter
1 Large Head Garlic
Salt
Pepper
Preheat oven to 425 degrees.

Remove all giblets and anything else from the inside of the chicken. Rinse with water. Place on baking sheet. Pat dry. Liberally salt and pepper outside of bird, including the inside of the cavity. Lift up skin on breast from near the cavity, separating skin from the muscle and making two small pockets. Add a pinch or two of salt and pepper in this area too.

Roughly chop onion into large chunks. Cut Garlic head in half horizontally, leaving skin on. Chop one lemon into large chunks. Squeeze lemon juice from the lemon over the bird. Stuff lemon peels/pulp chunks, with onions and bottom half of head of garlic (skin still on), into the bird.

Take second lemon and cut in half between ends with stems. Zest 1/2 of the lemon. Slice the other half into attractive slices, about 1/4 inch thick. Set aside. Take top half of garlic head and peel the cloves. Run through a garlic press and mix with lemon zest. Remove leaves from the rosemary stem. Finely chop about half of the rosemary and mix with the lemon zest/garlic and 2 TBS butter.

Rub lemon zest/rosemary/garlic/butter mixture inside breast pockets and on top and sides of chicken. Toss remaining rosemary leaves on top and around chicken. Some people dress the bird by tying the legs together with kitchen string and tucking the wings under. I never do and the chicken turns out fine. But I will leave that up to you.

Place stuffed bird, breast side up, in medium-sized cast iron dutch oven, with lid off. Garnish top with reserved lemon slices. Pour in 1 box of chicken stock. Place pot in preheated oven. Immediately reduce oven temperature to 375 degrees. Set timer for 1 hour, 45 minutes and bake. Remove chicken from pan and let rest on a serving platter for 15 minutes and serve. Any remaining juices may be strained and used to make a light sauce, by reducing with 1/2 cup of white wine.
Enjoy!

Friday, January 1, 2010

Decadent New Year's Eve Dinner (Part Two): Filet Mignon, Pupu-Style with Baked Garlic and Gorgonzola Sauce

I served this Pupu (Appetizer) on New Year's Eve 2009 for a special treat for my family and friends, Tom and Holly, who were joining us. I had already pre-prepared my entree, Seafood Gratin, and it was ready to go in the oven. So, I could get started on the Filet Mignon Pupu.

Serving a filet as a Pupu is a more economical great way to give everyone a taste of a great cut of meat, with delicious flavor. Count on about 1 filet for every two people. This recipe can also be used to serve Filet Mignon as an entree. My husband and guests swooned over this recipe. Definitely a keeper.

Filet Mignon Pupu-Style with Baked Garlic & Gorgonzola Sauce

Serves 8
Filet
4 - 4-6 oz Filet Mignon Steaks
Extra-virgin Olive Oil
Salt and Pepper
1 Tbsp finely chopped Rosemary
4 large cloves baked garlic
4 pats butter

Baked Garlic
2 heads of Garlic
Cut top of head of garlic
Drizzle with olive oil
Bake is small oven-proof dish at 400 for about 25 minutes. Let cool.
Remove 4 large cloves from one of the heads for the Filet Mignon recipe, and save the rest to serve with and spread on a fresh French Baguette.

Gorgonzola Sauce
1 Large Shallot (diced)
2 Cups Beef Stock
1 Tsp finely diced Rosemary
1 Cup Dry Sherry or Madiera Wine
1/4 Cup Dry Red Wine
4 oz Crumbled Gorgonzola Cheese
Salt and Pepper to taste
2 Tbsp Butter

Cooking the Steaks - This is a FOOLPROOF way to cook Filet Mignon
Preheat oven to 375.

Salt and pepper all sides of 4 Filet Mignon steaks (4-6 oz each)
Heat 2 Tbsp olive oil in stainless steel or enameled cast iron skillet over medium-high heat until just smoking.

Add steaks to pan. Sear each side for 3 minutes, flipping with tongs.

Remove steaks and place on baking sheet.
Bake steaks in oven for 8 minutes (med rare) - set timer. Start making Gorgonzola Sauce with same pan used to sear steaks (see below).

When timer goes off, remove baking sheet, leave oven on. Flip steaks.
Smash a baked garlic clove (see Baked Garlic, above) on each filet and spread with butter knife. Sprinkle each steak with a about 1/2 tsp of rosemary, and top with a pat of butter.
Return steaks to oven. Bake for an additional 8 minutes (med rare) - set timer. Go back to making sauce.

When timer goes off, remove steaks from oven. Let rest for a few minutes, while finishing up Sauce.

Save any accumulated juices and add to Gorgonzola Sauce.

Slice and serve Pupu-Style with Gorzonzola Dipping Sauce, French Bread & Baked Garlic OR
Serve Filets individually, as entrees, in a pool of Gorgonzola Sauce or with a Gorgonzola Sauce drizzle.

Preparing Gorgonzola Sauce
In same skillet used for searing steaks, which should still have some olive oil remaining, saute shallot and 1 tps rosemary for 2-3 minutes, over medium-high heat, until shallots are slightly translucent. There should be some accumulated brown bits from the steaks. Add the sherry or madiera, and red wine. Deglaze pan and reduce liquid to about 1/2, stirring with a wire whisk. Add 1 Tbsp butter, stirring to melt. Add 1 cup beef stock, reducing again to about 1/2. Add another Tbsp of butter. Continue stirring. Add 2d up of the beef stock, reduce again to about 1/2.

Add gorzonzola cheese crumbles, stirring with a whisk until melted and blended. Add any available drippings from cooked filets.
Reduce sauce, if necessary, until slightly thickened. It will still be a bit runny. Add salt and pepper to taste. Use as dipping sauce or drizzle on meat.

Decadent New Year's Eve Dinner (Part One): Champagne Seafood Gratin

This year my husband had to work late on New Year's Eve. Since President Obama is in Kailua, Marines involved in Homeland Defense all had to work overtime and split up the holidays. But I still wanted to make dinner special and memorable, even if late. So I needed something I could prepare in advance and then pop in the oven just before he was due home (around 10:00pm) -- a real treat. After all, this was his first New Year's Eve home after spending a year in Iraq.

And besides being New Year's Eve, this day was extra special because we got to meet President Obama, in person, near our home in Kailua. Along with several of our neighbors, my son and I gathered, watching him play golf, and were delighted when he stopped to chat and shake hands. Needless to say we were excited and happy and even more hopeful for 2010 after shaking hands with the President. But I digress.

I decided to make a Seafood Gratin, livened up with Champagne, and Filet Mignon, served Pupu style, with a Gorgonzola sauce. Side dish was White Asparagus Wrapped in Prosciutto. French Bread with Baked Garlic and a Nice Tossed Salad. Champagne to drink!

I started with the Champagne Seafood Gratin. This a a delicious and rich dish which may be served as either an entree or a first course, depending upon the serving size. I made this in entree size, in medium sized gratin dishes. You can also make this really festive by serving in large scallop shells.

Champagne Seafood Gratin
1 stick (8 Tbs) butter
2 lbs scallops (foot muscle removed) and/or shrimp (peeled and deveined, with no tails)
3/4 tsp Dried Thyme Powder
1 Bay leaf
1 large shallot
1 cup heavy cream
3 egg yolks
1 cup dry champagne/sparkling wine (or any dry white wine)
6 Tbsp Panko bread crumbs (Italian-style preparation, if you can find them)
2 Tbs Wondra pre-sifted flour
3 oz Pancetta (gently cooked, diced bacon may be substituted)
1 pound button mushrooms
6 Tbsp Grated Parmesan Cheese
1 1/4 cup Shredded Gruyere Cheese
Juice of 1 small lemon
1 tsp lemon zest

Prep Work:
Mash together until combined 3 tbs softened butter and all of the Wondra flour.
Dice the shallot
Finely dice the tarragon (for topping)
Finely dice the pancetta (for topping)
Finely grate Parmesan Cheese (for topping)
Slice all mushrooms
Juice the lemon, remove seeds, zest skin (zest for topping)
Whisk together heavy cream and egg yolks
Shred Gruyere Cheese

Tools:
Large stainless steel or enameled cast iron skillet, Slotted spoon, spatula, sieve, large plate, 1 medium bowl.

(1) Add the diced shallot to the skillet and saute over medium heat, with 3 tbs butter.

(2) Add Bay Leaf and dried Thyme. Stir.
(3) Add seafood. I used about a pound of bay scallops and a pound of bay shrimp, because that is what I already had in my freezer. I prefer to use larger scallops and shrimp. You can use all shrimp or all scallops, any size is fine.

(4) Toss seafood in butter. Add champagne and lemon juice. Depending upon the size of the seafood, cook 1-4 minutes, until just undercooked.

(5) Remove seafood from pan, with a slotted spoon, and set aside on a plate. If seafood is large, cut into bite sized pieces.
(6) Strain cooking juices from pan through a sieve into a medium bowl, removing shallots and bay leaf & disgarding them.
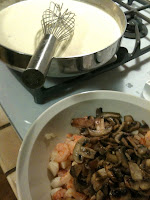
(7) Add 2 Tbsp butter to same pan. Toss in sliced mushrooms and saute, over medium heat, until softened and reduced, about 3-4 minutes. Remove mushrooms with a slotted spoon and add to seafood plate.
(8) Add reserved cooking liquid back to same pan in which the mushrooms were cooked. Reduce by 1/2. Add the four/butter mixture to the pan gradually in small plops, whisking to combine and make a smooth mixture.

(9) Add the heavy cream/egg yolk mixture slowly, while continuing to whisk, over low heat for 2 minutes, making sure that mixture does not boil. Sauce should be thickening.
(10) Slowly whisk in 1 1/4 cup gruyere cheese, making sure sauce stays smooth. Turn up heat slightly to melt the cheese, if necessary.

(10) When all cheese is melted and you have a thick sauce, add the mushrooms and seafood back into the sauce stirring gently. Remove from heat.
(11) Evenly pour seafood mixture into six indvidual gratin dishes. Set aside filled dishes on a baking sheet.

Topping: Combine bread crumbs, grated parmesan cheese, diced pancetta, diced tarragon, and lemon zest in a dish. Spinkle topping evenly over each gratin dish.

To serve immediately, place under low broiler for a few minutes until topping is toasted.
Or you can refrigerate, to serve later. To reheat, bake at 375 for 25-30 minutes.

Serve with a tossed salad, something very light and simple. This is a very rich dish. French bread is great, as a side, and delicious when dipped in the sauce.

Sunday, December 27, 2009

Weekend Gourmet's 10 Favorite Kitchen Things

Post Christmas ... I hope you had a wonderful time with family and friends and I hope Santa brought everyone lots of nice things for your kitchen!!

I was fortunate enough to recieve some great items from my dear husband and son. A cookbook, the quintessential Julia Child volume: Mastering the Art of French Cooking. Wonder how he got the idea for that one? Some super-cute ceramic measuring cups from Pier One, and last but not least, a tiny little mortar and pestle. Can wait to use them all!

But these gifts got me thinking about putting together a wish list of my own (I do foresee a copper bowl on the list), and of my most Favorite Things in My Kitchen. So I've compiled a list of my current favorite things. These are things I really would not want to live without and that I use fairly regularly. Would love comments and to hear more about your OWN favorites.
~ Aloha

(1) Le Creuset 5 1/2 Quart Cast Iron French Oven

My all-time favorite piece. I actually have this in green, not yellow, but any color is grand. Le Creuset is a classic cookware manufacturer. This is a heavy cast iron pot with easy to clean enamel interior. I use this pot or one in another size for so many things. Stews, soups, 1 dish meals, searing, braising, roasting. Though heavy, they are still great for transporting items you have to keep hot. These are expensive, heirloom pieces, but well worth the price.

(2) Polder 11 Pound Food Scale
Love this scale! We use it all the time. Looks great in the kitchen too!
Available on Amazon for about $20.

(3) Microplane Zester

Another super-handy item. Grate ginger, lemon zest, parmesan cheese, or chocolate. Mmm, so easy and quick!

(4) Silicon Baking Sheet Liners
Designed for baking, but I use them for roasting veggies also. Makes cleanup on your baking sheets quick and easy. Used these last for Oven Roasted Tomatoes. Just be careful with them. No knives!! They will last quite a while. Perfect for removing items from baking sheets, to cool, also. Great to have several on hand.

(5) Le Creuset Silicon Spoons/Spatulas

Must-have for use in all your enameled cast-iron cookware, and in your non-stick pots and pans, as well. I could not live without these. My non-stick pans now seem to last forever, since I started using these!


(6) Skimmmer/ Strainer Basket with Handle

These are of an Asian design, used for things like potstickers. Great for pasta, gnocci, or dumplings, but also for hardboiled eggs and veggies. Pull anything out of boiling water or broth that won't fit through the cracks. Love this tool!

(7) Bamboo Tongs

I know it is not smart, but I can't tell you how many times I have burned my fingers moving and removing cooking food prior to owning these. Tongs are a necessity and these bamboo ones are beautiful and "green," as well!

(8) Lots of Little Bowls

Oodles and Oodles of Bowls! Little bowls are so versatile. I love little bowls and ramekins. A pinch of this and a pinch of that. Organize all those ingredients for cooking. Give each of your guests dipping sauces on the side. Serve yourself just enough -- but not too much -- in a little bowl. Kids love things in little bowls too! Little bowls are just gosh darn cute!! These are from Crate & Barrel.


(9) Mandoline

This tool is a new addition to my kitchen which I absolutely adore. After all, who doesn't want to have perfectly sliced scalloped potatoes. Easy and quick and, most importantly, sure to cook evenly. I picked up the De Buyer Kobra slicer for about $40, on sale, at Williams-Sonoma because I was there, but you can spend 5 times that for a good mandoline or even less, if you look around. I find this price point and model is fine for my needs.

(10) Magnetic Knife Rack

I don't have a knife block, but prefer a magnetic knife holder. Keeps the knives near the sink and cutting board, high and away from small hands, and does not take up counter space. This is a great looking bamboo version. Makes me think about upgrading the one I already have.

(Bonus Favorite!)
I just couldn't limit myself to 10. But these are not really a cooking tool, anyway. I could not leave out the one and only Debbie Meyer Green Produce Bags. You've seen these on TV and now you are seeing them here! These things actually work! They are the best little bags for storing veggies in the fridge and especially, bananas and tomatoes on the counter. My bananas stay fresh for days, even with our warm humid Hawaii weather. These are a great product. I got them for my husband for Christmas because he likes them so much, but they were kind of really for me.

Love to hear your thoughts and what tools, equipment, and gadgets YOU love in your own kitchen!

Wednesday, October 28, 2009

A'Table Gourmet Cooking - Private Chef Classes & Dinner Parties

My girlfriend, Kasandra, got an amazing gift for her birthday this year: a private in-home gourmet cooking class and meal. I was fortunate enough to be invited to share in the food and fun. The class was conducted by private chef, Aline Steiner of a' table Hawaii, on Oahu.

Not to be confused with a caterer, Aline comes to your home with uncooked ingredients and all the necessary cooking gear, to prepare a pre-selected meal for 1-25 people to be served in your own home. Using your kitchen, she can prepare the entire meal, without assistance from the host/hostess, for a dinner party or other special evening. Or, as done for us, she prepares an entire meal as a cooking class, for up to about 6 people, depending upon how many people the kitchen will comfortably accomodate.

The a'table process started with a pre-event meeting between Kasandra and Aline. Kasandra chose the specific dishes that we prepared from a few suggested menus Aline had provided. The evening of the party, we showed up with nothing but our appetitites and Aline had done all the shopping.
The Menu:
Sauteed Mushrooms with Aoli on Crostini

Scallops Tequila Ceviche in Cucumber Cups


Roasted Tomatoes w/ Saffron & Thyme


Seared Lamb Chops with Rosemary Balsamic Reduction Sauce


Ricotta Gnocchi

Chocolate Truffles &
Rustic Almond Apple
Tart


We started with the Truffles, made from chocolate ganache and dipped in walnuts, coconut or seseame seeds and finished with the Lamb. In between, we sampled the appetizers and made all of the other delicious dishes, including homemade gnocchi, without using any potato! This was my favorite - total comfort food. Recipe is below.

In the end, we enjoyed a delicious feast and I also learned a few things I didn't know. I would highly recommend Aline to anyone who would like to learn to prepare some new dishes, in a fun group setting, or for a dinner party, where you would like to really be able to relax and enjoy your guests.

a'table Hawaii 808-221-3784
http://www.atablehawaii.com/

Aline's Recipe for Ricotta Gnocchi
Ingredients:
1 lb Whole Milk Ricotta
2 egg Yolks (M-L)
1/4 to 1/2 tsp Fine Sea Salt
1/2 Cup Parmesan Cheese
1 cup All-purpose Flour, plus extra for dusting the dough/board

Make sure your work surface and hands are very clean. Drain the ricotta over a colander to rid of any excess liquid. Have a large baking sheet, lined with parchment paper ready.

Into a large bowl, add the ricotta cheese, egg yolks, salt and freshly grated parmesan cheese. Mix well. Now add the flour and stir in briefly, just until combined - the dough will be quite sticky. Form a loaf and cut into 4 pieces and wrap 3 of them with plastic wrap.

Generously dust your work surface and hands with flour. Take the unwrapped piece of dough and roll it back and forth on the work surface, while applying gentle downward pressure. Form a long narrow cylinder of dough, about 18-20 inches in length, and about as thick as your index finger. Lightly dust with flour. Cut the cylinder into about 1 inch pieces and arrange in single layer on the baking sheet. Cover baking sheet with plastic wrap and set aside. Repeat these steps with the remaining 3 pieces of dough, placing the cut pieces on the same baking sheet, but making sure that all pieces are in a single layer and that none are touching, so that they won't stick to each other. You can freeze the gnocchi like this, so that you can bag them and store in the freezer.

To cook, bring a large pot of water to a boil, add a generous pinch of salt, and reduce heat untilt he water bubbles lightly. Add the gnocchi and stir once, so they don't stick to the bottom of the pot - and then let cook until they start floating to the top. Depending upon the size of the gnocchi, this may take 2-4 minutes. Remove from water with a slotted spoon and drain in a colander. Spread out in single layer on a baking sheet. You can reheat the gnocchi gently in a sauce and serve, or pan fry in a little olive oil and/or butter to lightly brown them before tossing with cheese or adding to a sauce. Enjoy!

Tuesday, October 27, 2009

Aloun Farm & Pumpkin Patch For Holiday Fun


This fall, don't forget to make a stop by Aloun Farms. Aloun Farms is famous, on Oahu, for its Halloween Pumpkin Patch and tours for school children. But have you thought about visiting year around for fresh produce?

Aloun Farms is located on 18 acres in the Ewa and Kunia areas of Oahu and employs 180 people. It's mission inlcudes the goal of reducing Hawaii's dependency on mainland produce, by providing competitively priced local products to the people of Hawaii, using sustainable practices and providing education and outreach to the community.

Products grown include pumpkins, of course, and vegetables such as bok choy, zucchini, radishes, onions, eggplant, string beans, cabbage, broccoli, corn, and cucumber. Fruits, such as cantaloupe, honeydew, watermelon and apple bananas and fresh herbs are also available.

Bring your kids for the Pumpkin Patch and have a great time picking out your Halloween pumpkins! Open Oct. 31, 9am-5pm. Admission is Free, Pumpkins priced on weight. Parking is $3.00. Also, pick-your-own sweet corn - 5 gallon bucket $15, 4 gallon bucket $12.

91-1440 Farrington Hwy
Kapolei, HI 96707
808-677-9516
(Take exit 6A)
http://www.alounfarms.com/